Warning
The documentation here may not directly apply to your version of Flight, locate your version of Flight here
Using OpenFoam with Alces Flight Compute
The following guide will run through the basics of using OpenFOAM together with an Alces Flight Compute environment.
Prerequisites
- Alces Flight Compute environment deployed with at least 1 compute node
- AutoScaling disabled (disable with
alces configure autoscaling disable)
Installing OpenFoam
The following section details how to install OpenFoam version 4 on your Alces Flight Compute environment. Note - access to the administrator user is required for this section.
You must first install the Gridware packages required to complete the following tutorial - install the required packages using the following example commands:
alces gridware install apps/openfoam/4.0.0
Running OpenFOAM
The following tutorial makes use of the OpenFOAM graphical interface. To use the graphical interface, a GNOME desktop session should be started. Sessions can easily be created using alces session. Create a GNOME desktop session and connect to it using your favourite VNC client:
[alces@login1(scooby) ~]$ alces session start gnome
VNC server started:
    Identity: 36a814b0-dc84-11e5-bcf2-fa163e8729ee
        Type: gnome
        Host: 10.77.2.129
        Port: 5901
     Display: 1
    Password: vvrDZM2Z
   Websocket: 41361

Depending on your client, you can connect to the session using:

  vnc://alces:vvrDZM2Z@10.77.2.129:5901
  10.77.2.129:5901
  10.77.2.129:1

If prompted, you should supply the following password: vvrDZM2Z
Loading OpenFOAM
Once you have connected to the VNC session - the OpenFOAM application will need to be loaded.
- Open the
Terminalapplication - Load the OpenFOAM module
module load apps/openfoam
- Using the Terminal session, navigate to the tutorials directory. The
$FOAM_TUTORIALSenvironment variable is automatically set when loading the OpenFOAM module, and will take you to the correct location:
[alces@login1(scooby) ~]$ cd $FOAM_TUTORIALS
[alces@login1(scooby) tutorials]$ ls
Allclean  basic         discreteMethods   financial       lagrangian  resources
Allrun    combustion    DNS               heatTransfer    mesh        stressAnalysis
Alltest   compressible  electromagnetics  incompressible  multiphase
- Make a copy of the
cavitytutorial to your home directory
cp -r $FOAM_TUTORIALS/incompressible/icoFoam/cavity/cavity $HOME/.
- Navigate to the
cavitydirectory in your home folder. From here we can create the mesh using the available OpenFOAM tools. From thecavitydirectory, run theblockMeshcommand - this will generate a mesh in OpenFOAM format:
[alces@login1(scooby) cavity]$ cd ~/cavity
[alces@login1(scooby) cavity]$ blockMesh
Build  : 2.2.1-57f3c3617a2d
Exec   : blockMesh
Date   : Feb 26 2016
Time   : 14:59:24
Host   : "login1"
PID    : 12720
Case   : /home/alces/cavity
nProcs : 1
fileModificationChecking : Monitoring run-time modified files using timeStampMaster
allowSystemOperations : Disallowing user-supplied system call operations

// * * * * * * * * * * * * * * * * * * * * * * * * * * * * * * * * * * * * * //
Create time

Creating block mesh from
    "/home/alces/cavity/constant/polyMesh/blockMeshDict"
Creating curved edges
Creating topology blocks
Creating topology patches

Creating block mesh topology

Check topology

        Basic statistics
                Number of internal faces : 0
                Number of boundary faces : 6
                Number of defined boundary faces : 6
                Number of undefined boundary faces : 0
        Checking patch -> block consistency

Creating block offsets
Creating merge list .

Creating polyMesh from blockMesh
Creating patches
Creating cells
Creating points with scale 0.1

Writing polyMesh
----------------
Mesh Information
----------------
  boundingBox: (0 0 0) (0.1 0.1 0.01)
  nPoints: 882
  nCells: 400
  nFaces: 1640
  nInternalFaces: 760
----------------
Patches
----------------
  patch 0 (start: 760 size: 20) name: movingWall
  patch 1 (start: 780 size: 60) name: fixedWalls
  patch 2 (start: 840 size: 800) name: frontAndBack

End
- You can verify success, and view information such as mesh size, geometrical size and some mesh checks using the
checkMeshcommand. - You’ve now created a case for the solver - which we can run using OpenFOAM. To run the process interactively, perform the following command:
[alces@login1(scooby) cavity]$ icoFoam
/*---------------------------------------------------------------------------*\
| =========                 |                                                 |
| \\      /  F ield         | OpenFOAM: The Open Source CFD Toolbox           |
|  \\    /   O peration     | Version:  4.0                                   |
|   \\  /    A nd           | Web:      www.OpenFOAM.org                      |
|    \\/     M anipulation  |                                                 |
\*---------------------------------------------------------------------------*/
Build  : 4.0
Exec   : icoFoam
Date   : Jan 04 2017
Time   : 14:04:02
Host   : "login1"
PID    : 24607
Case   : /home/alces/cavity
nProcs : 1
// * * * * * * * * * * * * * * * * * * * * * * * * * * * * * * * * * * * * * //
Create time

Create mesh for time = 0
<-- snip -->
Alternatively - the process can be automated through your cluster job scheduler.
- Now that you have completed your solve, you may wish to view the post-processing results. From a terminal window on your graphical desktop session, load the module files for the application:
[alces@login1(scooby) ~]$ module load apps/openfoam
- From the
cavitydirectory in your home folder, run the viewer - this will open up the paraFoam viewer interface:
[alces@login1(scooby) ~]$ cd ~/cavity
[alces@login1(scooby) cavity]$ paraFoam
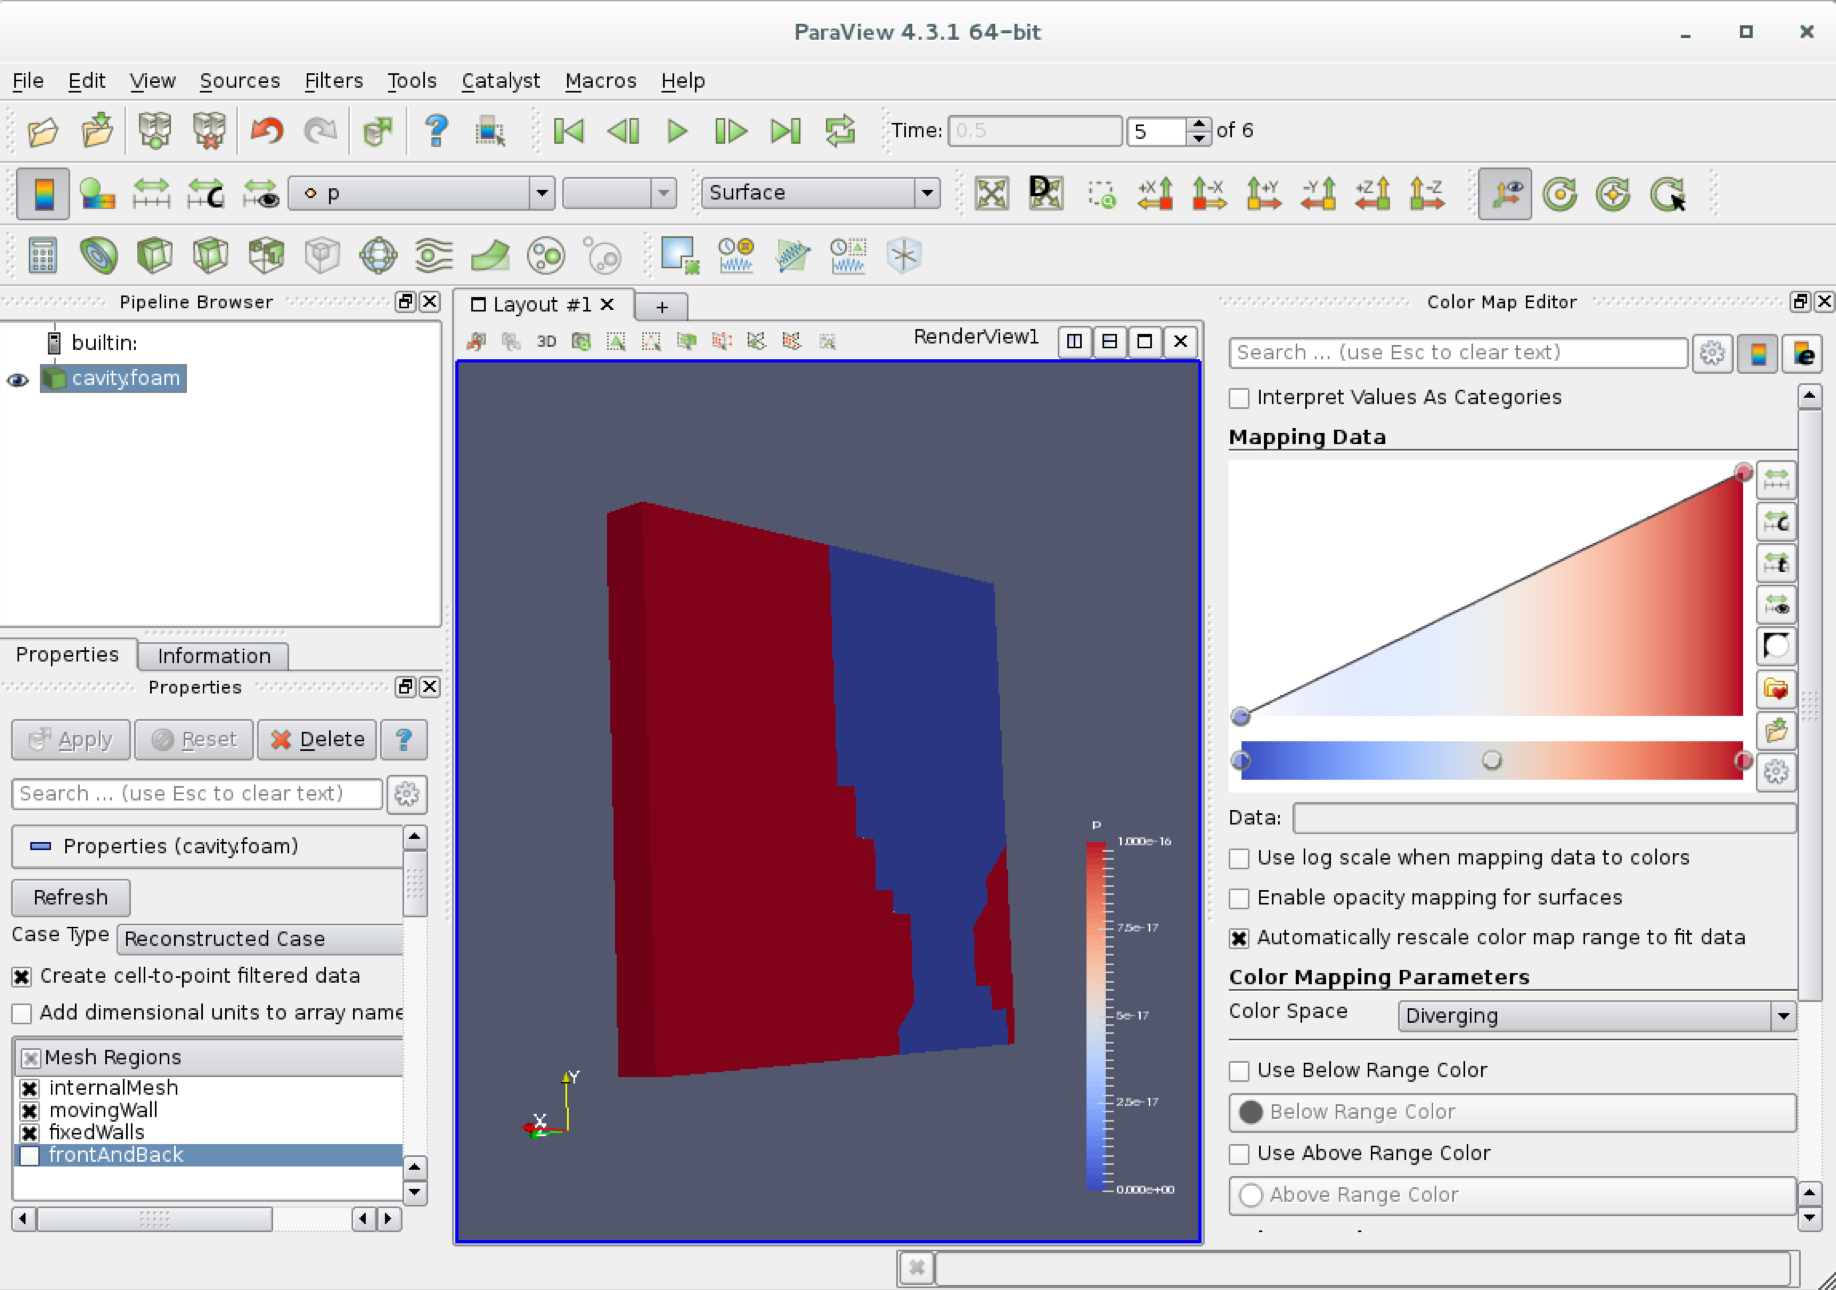
- Using the
Mesh Regionsbox on the bottom left of the interface - enable all of the Mesh regions. Once all of the Mesh regions are selected, click theApplybutton. - Click and drag on the blue image of the simulation to rotate the display.
- Click the
Playbutton using the toolbar to run the output.