Warning
The documentation here may not directly apply to your version of Flight, locate your version of Flight here
PBS Pro Scheduler
The PBS Pro cluster job scheduler is an open-source scheduler based on the original PBS codebase. PBS was originally developed by NASA - Altair Engineering now owns and maintains the PBS Pro cluster scheduler.
See jobschedulers for a description of the different use-cases of a cluster job-scheduler.
Running an interactive job
You can start a new interactive job on your Flight Compute cluster by using the qsub -I command; the scheduler will search for an available compute node, and provide you with an interactive login shell on the node if one is available.
[alces@login1(scooby) ~]$ qsub -I
qsub: waiting for job 0.login1.scooby.prv.alces.network to start
qsub: job 0.login1.scooby.prv.alces.network ready

<<< -[ alces flight ]- >>>
[alces@node-x3a(scooby) ~]$ hostname -f
node-x3a.scooby.prv.alces.network
In the above command, the qsub command is used together with the option -I which informs the cluster scheduler you wish to start an interactive job.
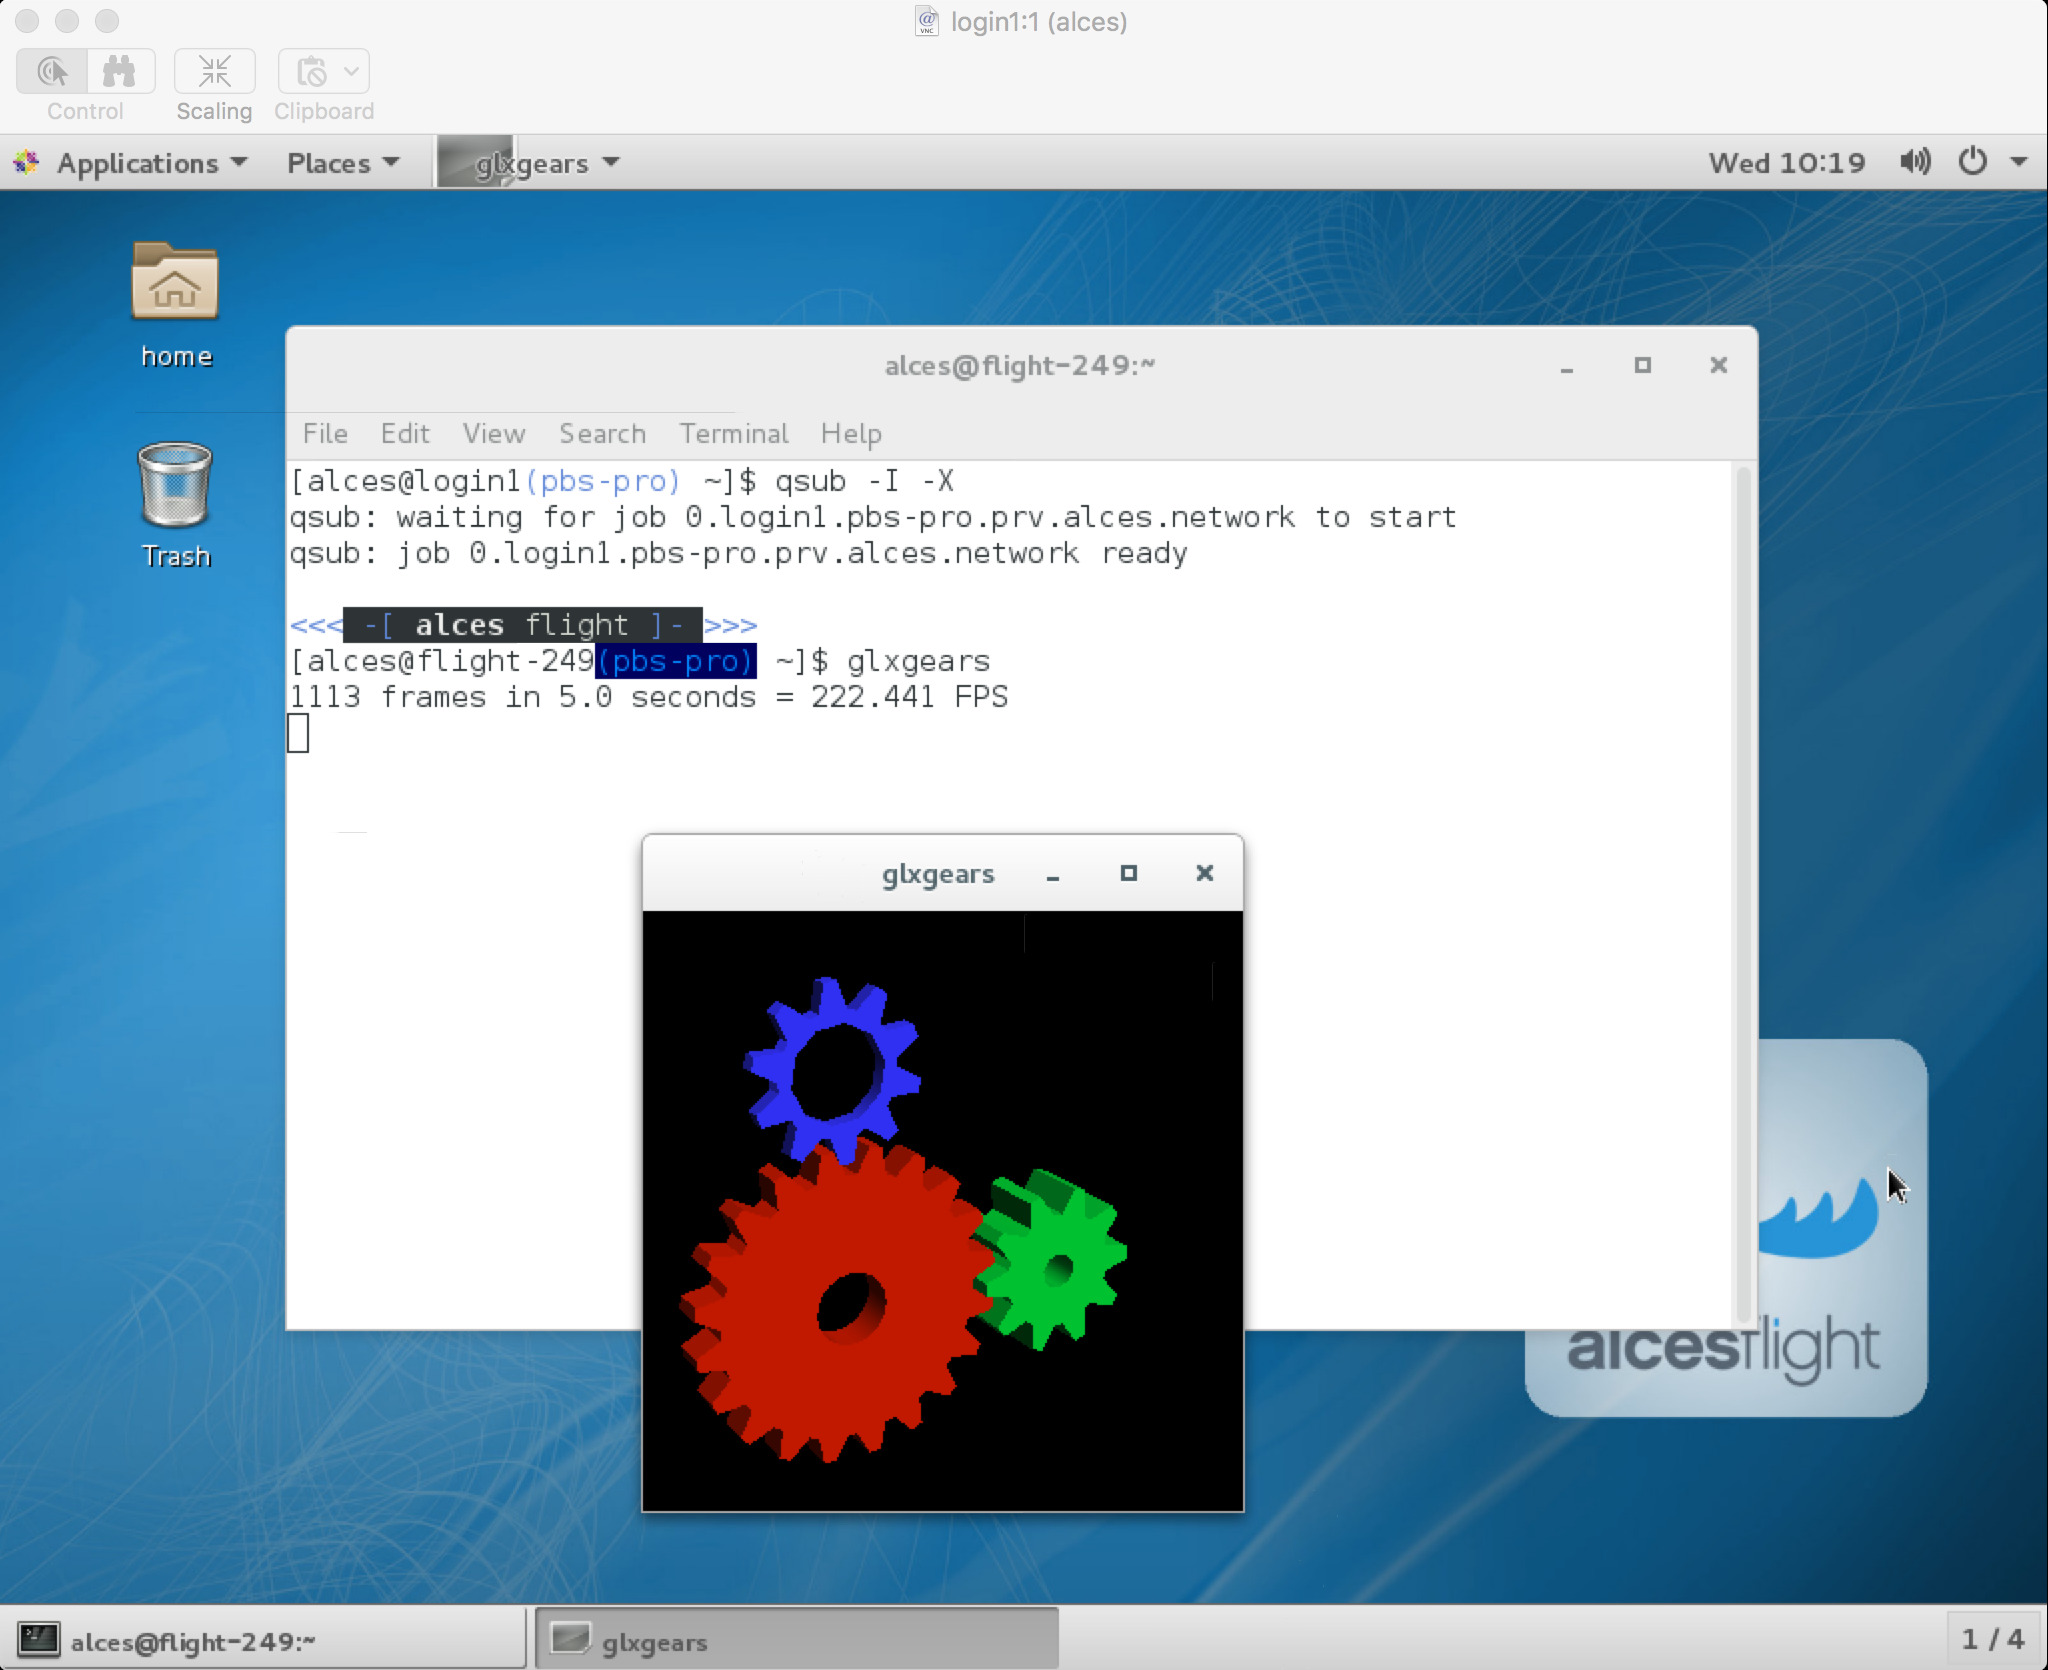
Alternatively, the qsub -I command can also be executed from an interactive desktop session; the job-scheduler will automatically find an available compute node to launch the job on. Applications launched from within the interactive session are executed on the assigned cluster compute node.
Note
In order to run graphical applications within an interactive session, you muts launch your interactive session with the -X option, which enables X forwarding. Launch an interactive session with X forwarding using the following command: qsub -I -X
When you’ve finished running your application in your interactive session, simply type logout, or press Ctrl+D to exit the interactive job.
If the job-scheduler could not satisfy the resource you’ve requested for your interactive job (e.g. all your available compute nodes are busy running other jobs), the job will queue until resources are available:
[alces@login1(scooby) ~]$ qsub -I
qsub: waiting for job 13.login1.scooby.prv.alces.network to start
Submitting a batch job
Batch (or non-interactive) jobs allow users to leverage one of the main benefits of having a cluster scheduler; jobs can be queued up with instructions on how to run them and then executed across the cluster while the user does something else. Users submit jobs as scripts, which include instructions on how to run the job - the output of the job (stdout and stderr in Linux terminology) is written to a file on disk for review later on. You can write a batch job that does anything that can be typed on the command-line.
We’ll start with a basic example - the following script is written in bash (the default Linux command-line interpreter). You can create the script yourself using the Nano command-line editor - use the command nano simplejobscript.sh to create a new file, then type in the contents below. The script does nothing more than print some messages to the screen (the echo
lines), and sleeps for 120 seconds. We’ve saved the script to a file called simplejobsscript.sh - the .sh extension helps to remind us that this is a shell script, but adding a filename extension isn’t strictly necessary for Linux.
#!/bin/bash -l
echo "Starting running on host $HOSTNAME"
sleep 120
echo "Finished running - goodbye from $HOSTNAME"
Note
We use the -l option to bash on the first line of the script to request a login session. This ensures that environment modules can be loaded as required as part of your script.
We can execute that script directly on the login node by using the command bash simplejobscript.sh - after a couple of minutes, we get the following output:
Started running on host login1
Finished running - goodbye from login1
To submit your job script to the cluster job scheduler, use the command qsub simplejobscript.sh. The job scheduler should immediately report the job-ID for your job; your job-ID is unique for your current Alces Flight Compute cluster - it will never be repeated once used.
[alces@login1(scooby) ~]$ qsub simplejobscript.sh
14.login1.scooby.prv.alces.network

[alces@login1(scooby) ~]$ cat simplejobscript.sh.o14
Starting running on host node-x3a
Finished running - goodbye from node-x3a
Viewing and controlling queued jobs
Once your job has been submitted, use the qstat command to view the status of the job queue. If you have available compute nodes, your job should be shown in the R (running) state; if your compute nodes are busy, or you’ve launched an auto-scaling cluster and currently have no running nodes, your job may be shown in the Q (queued) state until compute nodes are available to run it. Jobs shown in C state have completed, and are automatically removed from the job queue after a few minutes.
You can keep running the qstat command until your job finishes running. The output of your batch job will be stored in a file for you to look at. The default location to store the output file is your home directory. You can use the Linux more command to view your output file:
[alces@login1(scooby) ~]$ more simplejobscript.sh.o22
Starting running on host node-x3a
Finished running - goodbye from node-x3a
Your job runs on whatever node the scheduler can find which is available for use - you can try submitting a bunch of jobs at the same time, and using the qstat -n command, see which node the job is running on.
[alces@login1(scooby) ~]$ qstat -n

login1.scooby.prv.alces.network:
                                                            Req'd  Req'd   Elap
Job ID          Username Queue    Jobname    SessID NDS TSK Memory Time  S Time
--------------- -------- -------- ---------- ------ --- --- ------ ----- - -----
23.login1.pbs-p alces    workq    simplejobs   5974   1   1    --    --  R 00:00
   node-x3a
24.login1.pbs-p alces    workq    simplejobs   6068   1   1    --    --  R 00:00
   node-x3a
25.login1.pbs-p alces    workq    simplejobs   6159   1   1    --    --  R 00:00
   node-x3a
The scheduler is likely to spread jobs around over different nodes (if you have multiple nodes). The login node is not included in your cluster for scheduling purposes - jobs submitted to the scheduler will only run on your cluster compute nodes. You can use the qdel <job-ID> command to delete a job you’ve submitted, whether it’s running or still in the queued state.
[alces@login1(scooby) ~]$ qsub simplejobscript.sh
33.login1.scooby.prv.alces.network
[alces@login1(scooby) ~]$ qsub simplejobscript.sh
34.login1.scooby.prv.alces.network
[alces@login1(scooby) ~]$ qsub simplejobscript.sh
35.login1.scooby.prv.alces.network
[alces@login1(scooby) ~]$ qdel 34
[alces@login1(scooby) ~]$ qstat
Job id            Name             User              Time Use S Queue
----------------  ---------------- ----------------  -------- - -----
33.login1         simplejobscript  alces             00:00:00 R workq
35.login1         simplejobscript  alces             00:00:00 R workq
Viewing compute host status
Users can use the pbsnodes -av command to display the currently active compute hosts and information associated to each of those nodes, for example:
[alces@login1(scooby) ~]$ pbsnodes -av
node-x3a.scooby.prv.alces.network
     Mom = node-x3a.scooby.prv.alces.network
     ntype = PBS
     state = free
     pcpus = 8
     resources_available.arch = linux
     resources_available.host = node-x3a
     resources_available.mem = 14973084kb
     resources_available.ncpus = 8
     resources_available.vnode = node-x3a.scooby.prv.alces.network
     resources_assigned.accelerator_memory = 0kb
     resources_assigned.mem = 0kb
     resources_assigned.naccelerators = 0
     resources_assigned.ncpus = 0
     resources_assigned.netwins = 0
     resources_assigned.vmem = 0kb
     resv_enable = True
     sharing = default_shared
     license = l
The pbsnodes output will display the following information about the compute hosts in your cluster:
- The hostname of your compute nodes
- The number of nodes in the list
- Current usage of the node - if no jobs are running, the state will be listed as
free- The detected number of CPUs (including hyper-threaded cores)
- The amount of memory in KB per node
- The amount of disk space available per node
Controlling resources
In order to promote efficient usage of the cluster - the job-scheduler should be informed of any resource requirements of your submitted jobs in order to effectively fill the available compute hosts. By default, each of the available resource types are set to “unlimited”. Scheduling each of your jobs with “unlimited” definitions will mean it is harder to effectively schedule jobs. Defining the required resources means that the scheduler can better work out where a job should be placed to fully optimise the available compute estate.
Job instructions can be provided in two ways; they are:
- On the command line, as parameters to your
qsubcommand. For example, you can set the name of your job using the-N <name>option:
[alces@login1(scooby) ~]$ qsub -N mytestjob simplejobscript.sh
36.login1.scooby.prv.alces.network
[alces@login1(scooby) ~]$ qstat
Job id            Name             User              Time Use S Queue
----------------  ---------------- ----------------  -------- - -----
36.login1         mytestjob        alces             00:00:00 R workq
- In your job script, by including the scheduler directives at the top of your job script - you can achieve the same effect as providing options with the
qsubcommand. Lines in your script containing scheduler directives must start with#PBSand be located at the top of your script, after the shell line. Create an example job script or modify your existing script to include a scheduler directive to use a specified job name:
[alces@login1(scooby) ~]$ cat simplejobscript.sh
#!/bin/bash
#PBS -N mytestjob
echo "Starting running on host $HOSTNAME"
sleep 120
echo "Finished running - goodbye from $HOSTNAME"
[alces@login1(scooby) ~]$ qsub simplejobscript.sh
37.login1.scooby.prv.alces.network
[alces@login1(scooby) ~]$ qstat
Job id            Name             User              Time Use S Queue
----------------  ---------------- ----------------  -------- - -----
36.login1         mytestjob        alces             00:00:00 R workq
37.login1         mytestjob        alces             00:00:00 R workq
Including job scheduler instructions in your job-scripts is often the most convenient method of working for batch jobs - follow the guidelines below for the best experience:
- Lines in your script that include job-scheduler directives must start with
#PBSat the beginning of the line- You can have multiple lines starting with
#PBSin your job-script, but they must appear at the top of the script without any lines in-between- You can put multiple instructions separated by a space on a single line starting with
#PBS- The scheduler will parse the script from top to bottom and set instructions in order; if you set the same parameter twice, the second value will be used
- Instructions are parsed at job submission time, before the job itself has actually run. This means you can’t, for example, tell the scheduler to put your job output in a directory that you create in the job-script itself - the directory will not exist when the job starts running, and your job will fail with an error
- You can use dynamic variables in your instructions (see below)
Dynamic scheduler variables
Your cluster job scheduler automatically creates a number of pseudo environment variables which are available to your job-scripts when they are running on cluster compute nodes, along with standard Linux variables. Useful values include the following:
$HOMEThe location of your home-directory$USERThe Linux username of the submitting user$HOSTNAMEThe Linux hostname of the compute node running the job$PBS_JOBIDJob allocation number. If job is an array job, includes the array index$PBS_ARRAY_INDEXSub job index in job array, e.g.7$PBS_ARRAY_IDIdentifier for a job array. Sequence number of job array, e.g.1234[]
Simple scheduler instruction examples
Here are some commonly used scheduler instructions, along with some examples of their usage:
Setting output file location
To set the output file location for your job, use the -o [file_name] option. This will send all stdout to the specified file. The -e [file_name] option can also be used to specify an output file for all stderr. If you wish to combine both stdout and stderr to the same output file - you can use the option -j oe.
By default, the scheduler stores data relative to your home-directory - but to avoid confusion, we recommend specifying a full path to the filename to be used. Although Linux can support several jobs writing to the same output file, the result is likely to be garbled - it’s common practice to include something unique about the job (e.g. it’s job-ID) in the output filename to make sure your job’s output is clear and easy to read.
Note
The directory used to store your job output file(s) must exist before you submit your job to the scheduler. Your job may fail to run if the scheduler cannot create the output file in the directory requested.
For example; the following job-script includes a -o [file_name] instruction to set the output file location:
#!/bin/bash -l
#PBS -N mytestjob -o testjob
echo "Starting running on host $HOSTNAME"
sleep 120
echo "Finished running - goodbye from $HOSTNAME"
Note
PBS Pro does not support the use of dynamic environment variables within scheduler directives. You may use the $PBS_JOBID variable from within your job script, but not as part of the output file name
Note
The directory specified must exist and be accessible by the compute node in order for the job you submitted to run
Setting working directory for your job
PBS Pro uses the directory that the job was submitted from to define the working directory for a job - no matter the location of the job submission script. For example, on your cluster if you create a new directory in your home directory named outputs then cd to the outputs folder:
[alces@login1(scooby) ~]$ mkdir outputs && cd outputs
[alces@login1(scooby) outputs]$ pwd
/home/alces/outputs
You can then submit a job script that exists in any directory, and the job output and working directory will be the current working directory. The dynamic variable $PBS_O_WORKDIR variable should be used to determine the working directory. The following example job script demonstrates this functionality:
[alces@login1(scooby) outputs]$ cat ../wd.sh
#!/bin/bash -l
echo "My working directory is $PBS_O_WORKDIR"
[alces@login1(scooby) outputs]$ qsub ../wd.sh
30.login1.scooby.prv.alces.network
[alces@login1(scooby) outputs]$ cat wd.sh.o30
My working directory is /home/alces/outputs
Waiting for a previous job before running
You can instruct the scheduler to wait for an existing job to finish before starting to run the job you are submitting with the -W depend=[spec] option. For example, to wait until the job ID 55 has finished, the following example command can be used:
[alces@login1(scooby) ~]$ qsub simplejobscript.sh
55.login1.scooby.prv.alces.network
[alces@login1(scooby) ~]$ qsub -W depend=afterok:55 simplejobscript.sh
56.login1.scooby.prv.alces.network
[alces@login1(scooby) ~]$ qstat
Job ID                    Name             User            Time Use S Queue
------------------------- ---------------- --------------- -------- - -----
54.login1                  mytestjob        alces           00:00:00 C batch
55.login1                  mytestjob        alces                  0 R batch
56.login1                  mytestjob        alces                  0 H batch
Your job will be held in H (hold) state until the dependency condition is met.
Running task array jobs
A common workload is having a large number of jobs to run which basically do the same thing, aside perhaps from having different input data. You could generate a job-script for each of them and submit it, but that’s not very convenient - especially if you have many hundreds or thousands of tasks to complete. Such jobs are known as task arrays - an embarrassingly parallel job will often fit into this category.
A convenient way to run such jobs on a cluster is to use a task array, using the -J [array_spec] directive. Your job-script can then use the pseudo environment variables created by the scheduler to refer to data used by each task in the job. The following example job-script uses the $PBS_JOBID variable to echo its current task ID to an output file:
#!/bin/bash -l
#PBS -N array_job
#PBS -J 1-5
echo "Hello from $PBS_JOBID - I am array task $PBS_ARRAY_INDEX"
The example script will create output files for each of the task array jobs run through the scheduler:
[alces@login1(scooby) ~]$ ls
array_job.o59-1  array_job.o59-3  array_job.o59-5  clusterware-setup-sshkey.log
array_job.o59-2  array_job.o59-4  array_job.sh
[alces@login1(scooby) ~]$ cat array_job.o59-2
Hello from 59[2].login1.scooby.prv.alces.network - I am array task 2
All tasks in an array job are given a job ID with the format job_ID[task_number], e.g. 54[2] would be job number 54, array task 2.
Array jobs can easily be cancelled using the qdel command - the following examples show various levels of control over an array job:
qdel 60[]- Cancels all array tasks under the job ID
60 qdel 60[100-200]- Cancels array tasks
100-200under the job ID60 qdel 60[5]- Cancels array task
5under the job ID60
Note
When cancelling array tasks under an array job, the job ID number must include the two empty brackets [] as shown after the job ID
Requesting more resources
By default, jobs are constrained to the default set of resources - users can use scheduler instructions to request more resources for their jobs. The following documentation shows how these requests can be made.
Running multi-threaded jobs
If users want to use multiple cores on a compute node to run a multi-threaded application, they need to inform the scheduler - this allows jobs to be efficiently spread over compute nodes to get the best possible performance. Using multiple CPU cores is achieved by specifying -l ncpus=[count] option in either your submission command or as a scheduler directive in your job script. The -l ncpus=[count] option informs the scheduler of the number of cores you wish to reserve for use. If the parameter is omitted, a default of 1 core is assumed. For example, a user can specify the option -l ncpus=4 to request 4 CPU cores for your job.
Running Parallel (MPI) jobs
If users want to run parallel jobs via a message passing interface (MPI), they need to inform the scheduler - this allows jobs to be efficiently spread over compute nodes to get the best possible performance. Using multiple CPU cores across multiple nodes is achieved by specifying the following example option:
-l select=2:ncpus=1:mpiprocs=1 -l place=scatter
The above example would launch an MPI job with a total of 2 CPU cores across 2 separate compute hosts - each compute host would launch a single MPI task. The command consists of several options:
select=2- Select the number of chunks - a chunk is essentially a task, or MPI-rank
ncpus=1- Select the number of CPU cores to use per chunk
mpiprocs- Select the number of MPI processes to launch per chunk. This should be equal to
ncpus place=scatter- The
placeoption determines where MPI processes will launch. If thescatteroption is chosen - each chunk will be launched on a different compute host. Other available options arefree,packandexcl.
The following example shows launching the Intel Message-passing (IMB) MPI benchmark across 64 cores on your cluster. This application is launched via the OpenMPI mpirun command - the number of threads and list of hosts to use are specified as parameters to mpirun. This jobscript loads the apps/imb module before launching the application, which automatically loads the module for OpenMPI.
#!/bin/bash -l
#PBS -l select=4:ncpus=1:mpiprocs=1
#PBS -l place=scatter
#PBS -j oe
module load apps/imb
mpirun --prefix $MPI_HOME \
       -np 4 \
       -npernode 1 \
       --hostfile $PBS_NODEFILE \
       $(which IMB-MPI1)
The above example job script demonstrates several additionally required options in the mpirun command - most importantly -np <number> and -npernode <number>. These options define the total number of MPI processes, as well as the number of MPI processes per node to spawn.
Once the above job-script is submitted to the job-scheduler, the required number of nodes will be allocated for execution of the workload; e.g.
[alces@login1(scooby) ~]$ qsub imb_mpi.sh
77.login1.scooby.prv.alces.network
[alces@login1(scooby) ~]$ qstat -n

login1.scooby.prv.alces.network:
                                                            Req'd  Req'd   Elap
Job ID          Username Queue    Jobname    SessID NDS TSK Memory Time  S Time
--------------- -------- -------- ---------- ------ --- --- ------ ----- - -----
77.login1.pbs-p alces    workq    imb_mpi.sh  14129   4   4    --    --  R 00:00
   node-x3a+node-x4d+node-xe3+node-x70
Note
If you request more CPU cores than your cluster can accommodate, your job will wait in the queue. If you are using the Flight Compute auto-scaling feature, your job will start to run once enough new nodes have been launched.
Requesting more memory
In order to promote best-use of the cluster scheduler - particularly in a shared environment, it is recommended to inform the scheduler the maximum required memory per submitted job. This helps the scheduler appropriately place jobs on the available nodes in the cluster.
You can specify the maximum amount of memory required per submitted job with the -l mem=[XXXmb] option. This informs the scheduler of the memory required for the submitted job.
Note
When running a job across multiple compute hosts, the -l mem=[XXXmb] option informs the scheduler of the required memory per node
Requesting a longer runtime
In order to promote best-use of the cluster scheduler, particularly in a shared environment, it is recommended to inform the scheduler of the amount of time the submitted job is expected to take. You can inform the cluster scheduler of the expected runtime using the -l walltime=[hh:mm:ss] option. For example - to submit a job that runs for a maximum of 2 hours, the following example job script could be used:
#!/bin/bash -l
#PBS -l walltime=02:00:00
sleep 120
Further documentation
This guide is a quick overview of some of the many available options of the PBS Pro cluster scheduler. For more information on the available options, you may wish to reference some of the following available documentation for the demonstrated PBS Pro commands;
- Use the
man qstatcommand to see a full list of scheduler queue instructions- Use the
man qsubcommand to see a full list of scheduler submission instructions- Online documentation for the PBS Pro scheduler is available here