Using OpenFoam with Alces Flight Compute
The following guide will run through the basics of using OpenFOAM together with an Alces Flight Compute environment.
Prerequisites
- Alces Flight Compute environment deployed with at least 1 compute node
- AutoScaling disabled (disable with
alces configure autoscaling disable)
Installing OpenFoam
The following section details how to install OpenFoam version 4 on your Alces Flight Compute environment. Note - access to the administrator user is required for this section.
You must first install the Gridware packages required to complete the following tutorial - install the required packages using the following example commands:
alces gridware install apps/openfoam/4.0.0
Running OpenFOAM
The following tutorial makes use of the OpenFOAM graphical interface. To use the graphical interface, a GNOME desktop session should be started. Sessions can easily be created using alces session. Create a GNOME desktop session and connect to it using your favourite VNC client:
[alces@login1(scooby) ~]$ alces session start gnome
VNC server started:
    Identity: 36a814b0-dc84-11e5-bcf2-fa163e8729ee
        Type: gnome
        Host: 10.77.2.129
        Port: 5901
     Display: 1
    Password: vvrDZM2Z
   Websocket: 41361

Depending on your client, you can connect to the session using:

  vnc://alces:vvrDZM2Z@10.77.2.129:5901
  10.77.2.129:5901
  10.77.2.129:1

If prompted, you should supply the following password: vvrDZM2Z
Loading OpenFOAM
Once you have connected to the VNC session - the OpenFOAM application will need to be loaded.
- Open the
Terminalapplication - Load the OpenFOAM module
module load apps/openfoam
- Using the Terminal session, navigate to the tutorials directory. The
$FOAM_TUTORIALSenvironment variable is automatically set when loading the OpenFOAM module, and will take you to the correct location:
[alces@login1(scooby) ~]$ cd $FOAM_TUTORIALS
[alces@login1(scooby) tutorials]$ ls
Allclean  basic         discreteMethods   financial       lagrangian  resources
Allrun    combustion    DNS               heatTransfer    mesh        stressAnalysis
Alltest   compressible  electromagnetics  incompressible  multiphase
- Make a copy of the
cavitytutorial to your home directory
cp -r $FOAM_TUTORIALS/incompressible/icoFoam/cavity/cavity $HOME/.
- Navigate to the
cavitydirectory in your home folder. From here we can create the mesh using the available OpenFOAM tools. From thecavitydirectory, run theblockMeshcommand - this will generate a mesh in OpenFOAM format:
[alces@login1(scooby) cavity]$ cd ~/cavity
[alces@login1(scooby) cavity]$ blockMesh
Build  : 2.2.1-57f3c3617a2d
Exec   : blockMesh
Date   : Feb 26 2016
Time   : 14:59:24
Host   : "login1"
PID    : 12720
Case   : /home/alces/cavity
nProcs : 1
fileModificationChecking : Monitoring run-time modified files using timeStampMaster
allowSystemOperations : Disallowing user-supplied system call operations

// * * * * * * * * * * * * * * * * * * * * * * * * * * * * * * * * * * * * * //
Create time

Creating block mesh from
    "/home/alces/cavity/constant/polyMesh/blockMeshDict"
Creating curved edges
Creating topology blocks
Creating topology patches

Creating block mesh topology

Check topology

        Basic statistics
                Number of internal faces : 0
                Number of boundary faces : 6
                Number of defined boundary faces : 6
                Number of undefined boundary faces : 0
        Checking patch -> block consistency

Creating block offsets
Creating merge list .

Creating polyMesh from blockMesh
Creating patches
Creating cells
Creating points with scale 0.1

Writing polyMesh
----------------
Mesh Information
----------------
  boundingBox: (0 0 0) (0.1 0.1 0.01)
  nPoints: 882
  nCells: 400
  nFaces: 1640
  nInternalFaces: 760
----------------
Patches
----------------
  patch 0 (start: 760 size: 20) name: movingWall
  patch 1 (start: 780 size: 60) name: fixedWalls
  patch 2 (start: 840 size: 800) name: frontAndBack

End
- You can verify success, and view information such as mesh size, geometrical size and some mesh checks using the
checkMeshcommand. - You’ve now created a case for the solver - which we can run using OpenFOAM. To run the process interactively, perform the following command:
[alces@login1(scooby) cavity]$ icoFoam
/*---------------------------------------------------------------------------*\
| =========                 |                                                 |
| \\      /  F ield         | OpenFOAM: The Open Source CFD Toolbox           |
|  \\    /   O peration     | Version:  4.0                                   |
|   \\  /    A nd           | Web:      www.OpenFOAM.org                      |
|    \\/     M anipulation  |                                                 |
\*---------------------------------------------------------------------------*/
Build  : 4.0
Exec   : icoFoam
Date   : Jan 04 2017
Time   : 14:04:02
Host   : "login1"
PID    : 24607
Case   : /home/alces/cavity
nProcs : 1
// * * * * * * * * * * * * * * * * * * * * * * * * * * * * * * * * * * * * * //
Create time

Create mesh for time = 0
<-- snip -->
Alternatively - the process can be automated through your cluster job scheduler.
- Now that you have completed your solve, you may wish to view the post-processing results. From a terminal window on your graphical desktop session, load the module files for the application:
[alces@login1(scooby) ~]$ module load apps/openfoam
- From the
cavitydirectory in your home folder, run the viewer - this will open up the paraFoam viewer interface:
[alces@login1(scooby) ~]$ cd ~/cavity
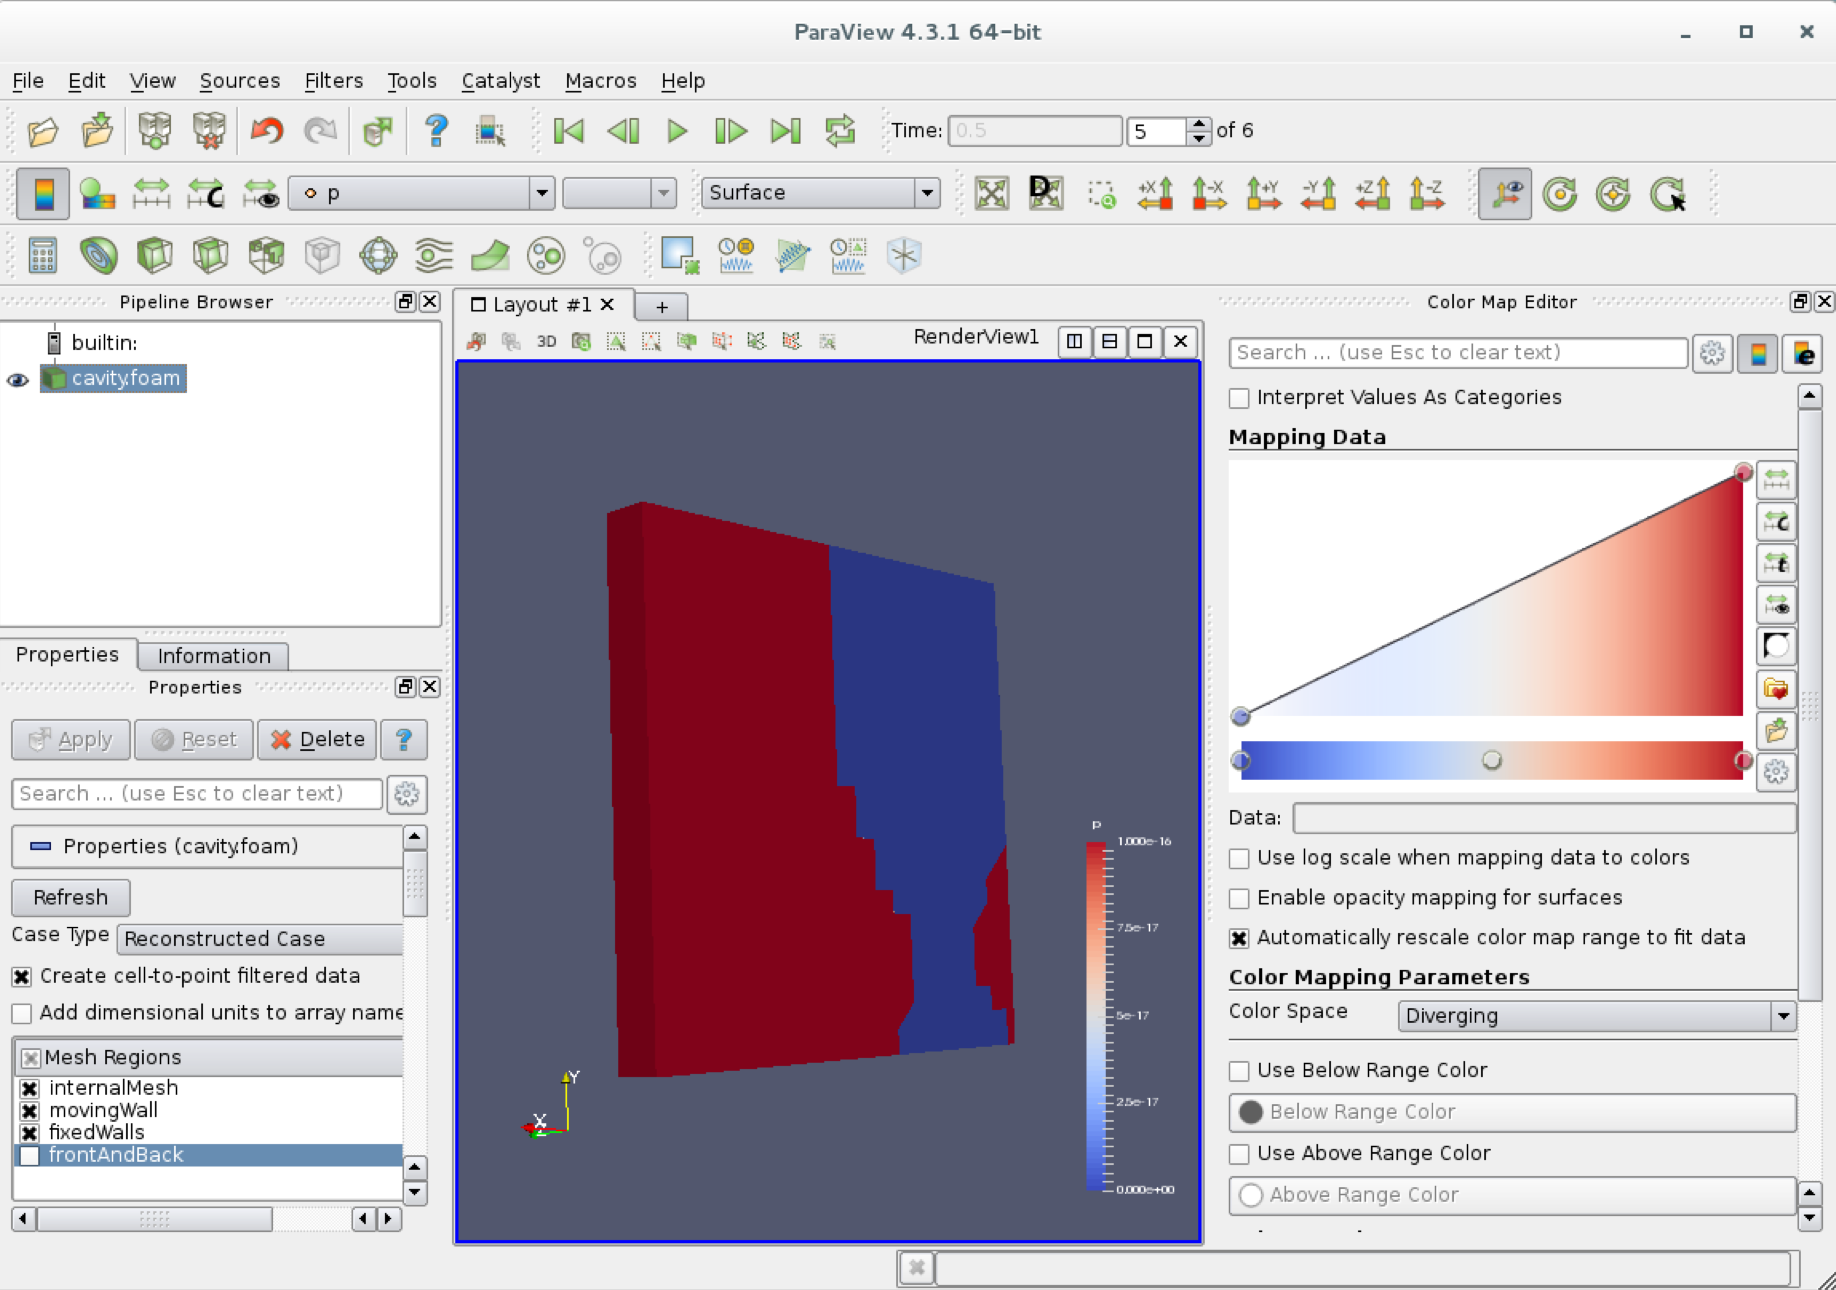
[alces@login1(scooby) cavity]$ paraFoam
- Using the
Mesh Regionsbox on the bottom left of the interface - enable all of the Mesh regions. Once all of the Mesh regions are selected, click theApplybutton. - Click and drag on the blue image of the simulation to rotate the display.
- Click the
Playbutton using the toolbar to run the output.